参考资料
主要参考资料
https://blog.51cto.com/andyxu/2319767
https://www.oschina.net/news/100931/redis-5-0-released
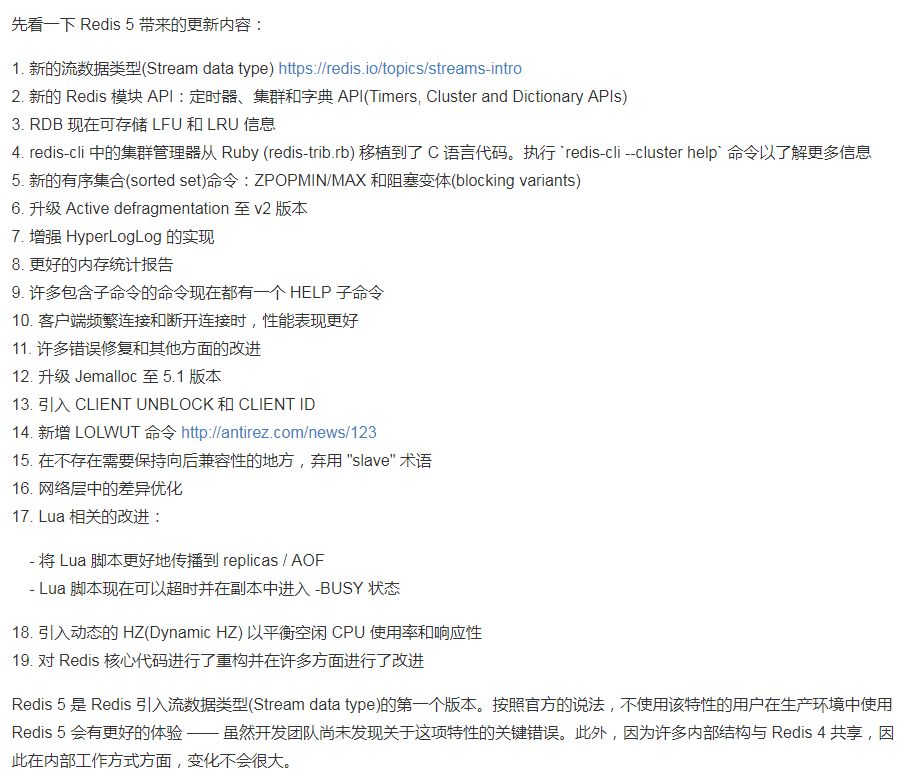
redis 5.0主要的特性
最吸引我的可能就是第二点。要知道基于ruby的集群方案,真的比较让人酸爽。
安装过程
下载、解压、编译
yum -y install make gcc gcc-c++ wget
wget http://download.redis.io/releases/redis-5.0.0.tar.gz
tar zxvf redis-5.0.0.tar.gz
cd redis-5.0.0/
make && make install PREFIX=/data/redis
echo "export PATH=$PATH:/data/redis/bin" >> /etc/profile
source /etc/profile
|
redis客户端命令
redis集群配置
配置文件
7001端口
#redis监听的本地IP地址
bind 192.168.128.54

#监听端口
port 7001

#开启后台运行,no表示运行在前台
daemonize yes

#pid文件,另一个节点改为7002
pidfile /var/run/redis_7001.pid

#开启aof日志,每次写操作都会记录一条日志
appendonly yes

appendfilename "appendonly7001.aof"

#开启集群,把注释去掉
cluster-enabled yes

dbfilename dump7001.rdb

#集群的配置文件,首次启动会自动创建
cluster-config-file nodes-7001.conf

#集群节点连接超时时间,15秒
cluster-node-timeout 15000
|
7002端口
#redis监听的本地IP地址
bind 192.168.128.54

#监听端口
port 7002

#开启后台运行,no表示运行在前台
daemonize yes

#pid文件
pidfile /var/run/redis_7002.pid

#开启aof日志,每次写操作都会记录一条日志
appendonly yes

appendfilename "appendonly7002.aof"

dbfilename dump7002.rdb

#开启集群,把注释#去掉
cluster-enabled yes

#集群的配置文件,首次启动会自动创建
cluster-config-file nodes-7002.conf

#集群节点连接超时时间,15秒
cluster-node-timeout 15000
|
7003端口
#redis监听的本地IP地址
bind 192.168.128.54

#监听端口
port 7003

#开启后台运行,no表示运行在前台
daemonize yes

#pid文件,另一个节点改为7002
pidfile /var/run/redis_7003.pid

#开启aof日志,每次写操作都会记录一条日志
appendonly yes

appendfilename "appendonly7003.aof"

dbfilename dump7003.rdb

#开启集群,把注释#去掉
cluster-enabled yes

#集群的配置文件,首次启动会自动创建
cluster-config-file nodes-7003.conf

#集群节点连接超时时间,15秒
cluster-node-timeout 15000
|
7004端口
#redis监听的本地IP地址
bind 192.168.128.54

#监听端口
port 7004

#开启后台运行,no表示运行在前台
daemonize yes

#pid文件,另一个节点改为7002
pidfile /var/run/redis_7004.pid

#开启aof日志,每次写操作都会记录一条日志
appendonly yes

appendfilename "appendonly7004.aof"

dbfilename dump7004.rdb

#开启集群,把注释#去掉
cluster-enabled yes

#集群的配置文件,首次启动会自动创建
cluster-config-file nodes-7004.conf

#集群节点连接超时时间,15秒
cluster-node-timeout 15000
|
7005端口
#redis监听的本地IP地址
bind 192.168.128.54

#监听端口
port 7005

#开启后台运行,no表示运行在前台
daemonize yes

#pid文件
pidfile /var/run/redis_7005.pid

#开启aof日志,每次写操作都会记录一条日志
appendonly yes

appendfilename "appendonly7005.aof"

dbfilename dump7005.rdb

#开启集群,把注释#去掉
cluster-enabled yes

#集群的配置文件,首次启动会自动创建
cluster-config-file nodes-7005.conf

#集群节点连接超时时间,15秒
cluster-node-timeout 15000
|
7006端口
#redis监听的本地IP地址
bind 192.168.128.54

#监听端口
port 7006

#开启后台运行,no表示运行在前台
daemonize yes

#pid文件
pidfile /var/run/redis_7006.pid

#开启aof日志,每次写操作都会记录一条日志
appendonly yes

appendfilename "appendonly7006.aof"

dbfilename dump7006.rdb

#开启集群,把注释去掉
cluster-enabled yes

#集群的配置文件,首次启动会自动创建
cluster-config-file nodes-7006.conf

#集群节点连接超时时间,15
cluster-node-timeout 15000
|
节点启动脚本redis-all.sh
#!/bin/bash
/data/redis/bin/redis-server /data/redis/conf/redis7001.conf
/data/redis/bin/redis-server /data/redis/conf/redis7002.conf
/data/redis/bin/redis-server /data/redis/conf/redis7003.conf
/data/redis/bin/redis-server /data/redis/conf/redis7004.conf
/data/redis/bin/redis-server /data/redis/conf/redis7005.conf
/data/redis/bin/redis-server /data/redis/conf/redis7006.conf
|
集群创建脚本redis-cluster.sh
#!/bin/bash
/data/redis/bin/redis-cli --cluster create 192.168.128.54:7001  192.168.128.54:7002 192.168.128.54:7003 192.168.128.54:7004 192.168.128.54:7005 192.168.128.54:7006 --cluster-replicas 1
|
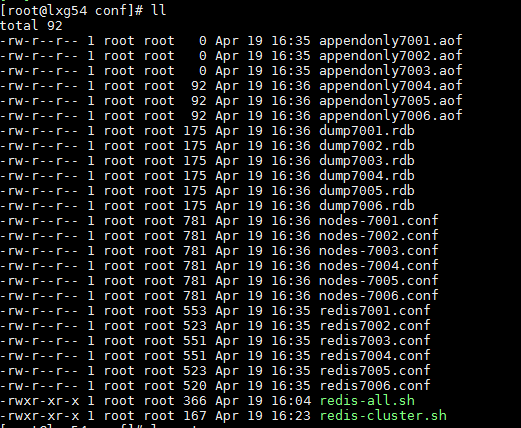
启动后的文件信息
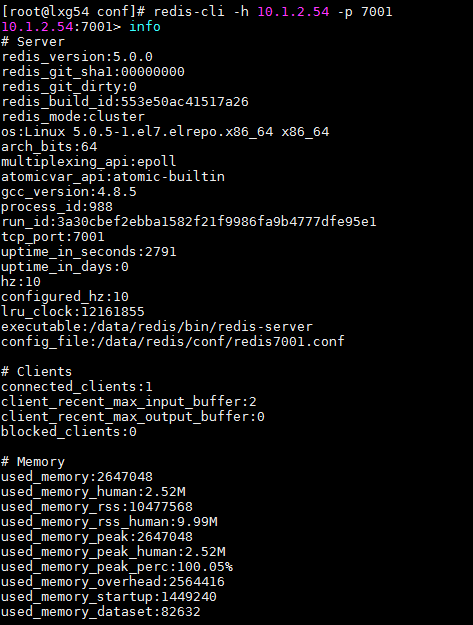
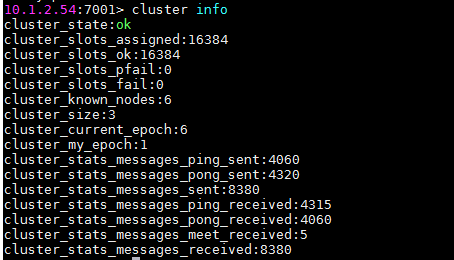
体验redis集群